
ATHLETICS
Sub-Strand 2.1: Sprints
- Starts:
- Bunch Start:
- Feet close together behind the starting line.
- Hands shoulder-width apart, fingers forming an arch. Knees bent, body leaning forward.
- Bunch Start:
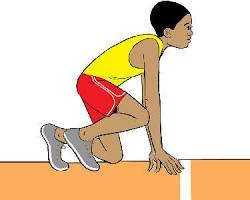
Bunch start position
- Medium Start:
- Front foot slightly behind the starting line.
- Back knee positioned midway between the front foot and hands. Hands and body position similar to the bunch start.
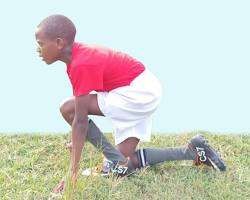
Medium start position
- Elongated Start:
- Front foot well behind the starting line.
- Back knee positioned further back than in the medium start.
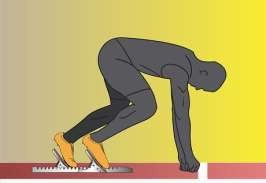
Elongated start position
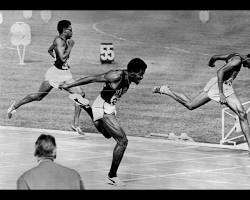
- Acceleration:
- Body Position:
- Lean forward from the start.
- Gradually straighten the body as speed increases.
- Body Position:
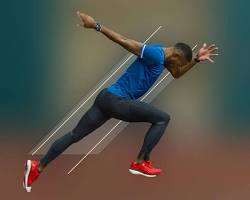
Sprinter accelerating with proper body position
- Leg Action:
- Drive knees high.
- Powerful push-off from the ground.
- Short, quick strides initially.
- Increasing stride length as speed builds.
- Arm Action:
- Drive arms forward and backward in opposition to the legs.
- Elbows bent at approximately 90 degrees.

sprinter with proper leg and arm action
- Finish – Dip:
- Technique:
o Lean forward at the finish line. o Thrust the chest forward as the line is crossed. o Arms swing backward for momentum.
sprinter performing a dip finish
Practical Activities:
- Observe live or virtual performances of sprint races, while keenly observing the sprint start of bunch, medium and elongated starts.
- Demonstrate the bunch start in sprints.
- Demonstrate medium start in sprints.
- Demonstrate elongated start in sprint.
- Demonstrate the body position, leg and arm action, during acceleration in a sprint race.
- Demonstrate the body position, leg and arm action, during a dip finish in a sprint race.
- Take turns to practise the bunch, medium and elongated starts with peers.
- Participate in sprint races applying the starts and the running skills while observing safety.
- Observe and give feedback on each other’s performance as they practise the starts and running skills.
Suggested Key Inquiry Questions:
1. Why is it crucial to accelerate and maintain body alignment during sprints? Acceleration maximizes speed over a short distance.
- Proper body alignment minimizes air resistance and ensures efficient force transfer.
- Proper technique prevents injury.
2. Why is participating in sprinting events beneficial in Kenya? Showcases Kenyan athletic talent on the global stage.
- Promotes physical fitness and healthy lifestyles.
- Creates opportunities for athletes to pursue professional careers.
- Boosts national pride.
- Provides entertainment. Sub-Strand 2.2: Long Jump (10 Lessons)
- Facility and Equipment:
- Facility:
- Runway: 40m long, 1.22m wide.
- Take-off board: 1.22m long, 20cm wide. Landing pit: Filled with sand.
- Facility:
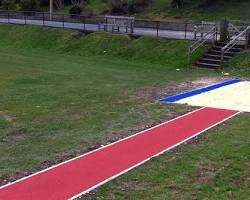
Long jump runway and landing pit
- Equipment:
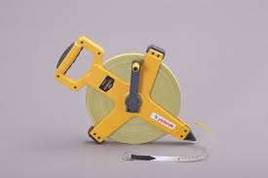
- Measuring tape.
- Rake (for the landing pit).
- Take-off board indicators.
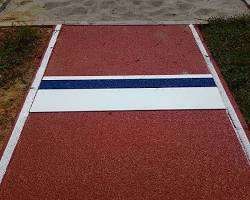
Take off board.
- Long Jump Techniques:
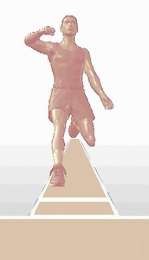
- Approach:
- Accelerated run towards the take-off board. Maintain consistent speed and rhythm.
- Approach:

Long jumper running down the runway
- Take-off:
- Plant the take-off foot on the board.
- Drive the opposite knee upward.
- Swing arms upward for momentum.
Long jumper taking off from the board
- Flight:
- Hang technique: Body arched, legs extended forward.
- Hitch-kick technique: Legs cycle in a running motion in the air.

long jumper in the hang technique
- Landing:
- Extend legs forward, raise arms.
- Land on both feet, bending knees to absorb impact.

long jumper landing in the sand pit
- Recovery:
- Move forward out of the landing pit to avoid affecting the measured distance.
- Maintain balance after landing.
Practical Activities:
- Observe pictures or real Long jump facilities and take note of the equipment used.
- Search and watch video clips or live demonstration of Long jump.
- Demonstrate the hang and hitch kick techniques following the approach, take off, flight, landing and recovery phases in Long jump while observing safety.
- Practice the hang and hitch kick techniques by following the phases of approach, take off, flight, landing and recovery in Long jump while using the runway.
- Collaboratively, play a mini Long Jump games while applying the techniques learnt.
- Share feedback on own and others’ performance in Long jump.
Suggested Key Inquiry Questions:
- How do Long jump phases assist in the development of skills?
- Each phase focuses on specific skills: approach for speed, take-off for power, flight for balance and technique, and landing for safety.
- Breaking down the jump into phases allows for focused practice and skill development.
- It allows for easier identification of areas that need improvement.
- How is safety enhanced in Long jump?
- Proper landing technique to prevent injuries.
- Well-maintained landing pit with soft sand.
- Clear runway and take-off area.
- Proper warm-up and cool-down exercises. Awareness of surroundings. Sub-Strand 2.3: Javelin Throw (10 Lessons)
- Facility and Equipment:
- Facility:
- Runway: 30-36.5m long, 4m wide.
- Throwing arc: 8m radius.
- Landing sector: 29-degree angle.
- Facility:
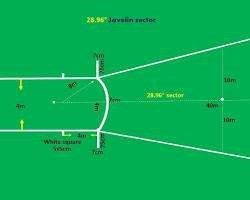
Javelin throwing sector
- Equipment:
- Javelin (various weights and lengths).

- Measuring tape.
- Flags or markers.

- Javelin Throw Techniques:
- Grip:
- American grip, Finnish grip, or fork grip.
- Hold the javelin behind the binding with the index finger or middle finger along the shaft.
- [Image showing a correct Javelin grip] Carriage:
- Javelin held above the shoulder, parallel to the runway.
- Elbow bent, tip pointing forward.
- [Image showing a correct javelin carriage] Approach:
- Accelerated run towards the throwing arc. Maintain balance and rhythm.
- Grip:
Javelin throwers approach run
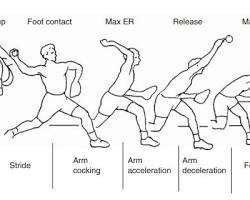
- Crossover:
- Plant the left foot (for right-handed throwers) and begin the throwing motion.
- Rotate the hips and shoulders.
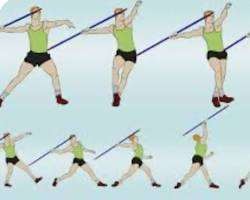
Javelin thrower in crossover phase.
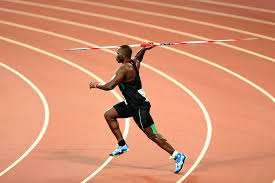
- Release:
Extend the arm and release the javelin at a 30-35 degree angle. Snap the wrist for maximum distance.
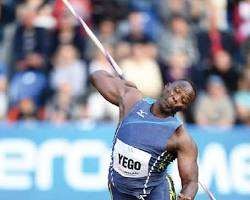
Javelin thrower releasing the javelin
- Follow Through:
- Continue the throwing motion, landing on the right foot (for right-handed throwers).
- Maintain balance.
Javelin thrower in the follow through phase
Practical Activities:
- Observe pictures or real Javelin throwing sector and to familiarise with the facility and equipment, techniques and safety.
- Use digital devices to search and watch videos on Javelin throw.
- Demonstrate the grip, carriage, approach, cross over, release and follow through in Javelin throw while observing safety.
- Practice Javelin throw following the phases: grip, carriage approach, cross over, release and follow through.
- Acknowledge own and others’ Javelin throwing skills.
Suggested Key Inquiry Questions:
- How has Javelin throwing benefited the athletes?
- Develops upper body strength and coordination.
- Enhances overall athleticism.
- Provides opportunities for competition and achievement.
- Can lead to professional athletic careers. Promotes discipline and focus.
- How can safety be enhanced in Javelin throw? Proper warm-up and cool-down exercises.
- Designated throwing sector and landing area.
- Ensuring no one is in the landing area during throws.
- Proper grip and throwing technique.
- Supervision by qualified instructors.
- Adhering to safety rules and guidelines.