Drawing
a. Still-life drawing
- Drawing involves a lot of techniques which include: smudge technique, value gradation and composing images in still life. Pictorial.
- When drawing Images are arranged in landscape or portrait
In landscape format objects are arranged in a horizontal layout within the pictorial space of an artwork.
In portrait format – objects are arranged in a vertical layout within the pictorial
space of an artwork.

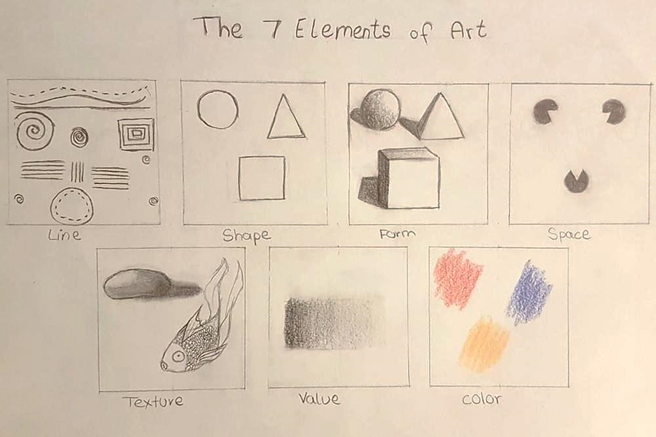
Elements of art applied while drawing pictorials include:
- Line – this is a mark made on the surface by a moving object, joined to create various shapes.
- Value- it is the light and dark areas on an object created by how light falls on the objects.
- Texture – this is the surface quality of an object described as either rough or smooth.
- Form – it is the detail within the boundaries of a shape that gives it volume and solidity.
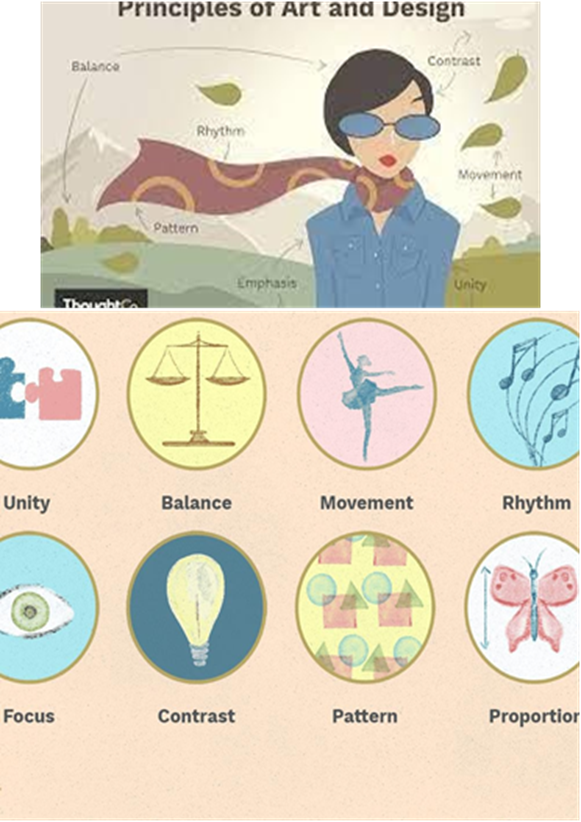
- There are also principles of art that are used to organize the elements in the pictorial space when creating images. These principles are –
- Rhythm and movement – it is the arrangement of objects to create distance and depth within an artwork.
- Balance- It is a state of equilibrium of the visual weight in a composition
- Proportion – it is the size relationship of objects within an artwork with each other and the whole composition.

- Remember that all these elements should be applied in still-life drawing.
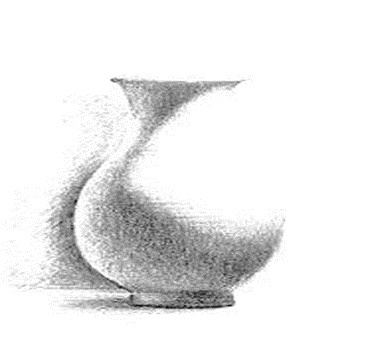
- Cross-hatching technique
- This is a technique of shading where lines are drawn to cross over each other, sparsely in lighter areas and close together in dark areas.
- Cross-hatching is another technique of showing value on forms. Value is the effect of light and dark on objects shown as light falls on the objects.
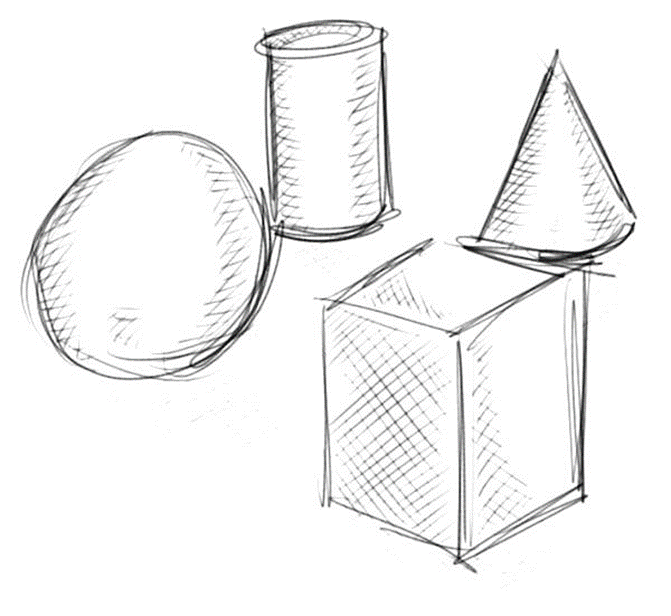
- In cross-hatching use of cylindrical forms will assist to create still life composition of cylindrical forms. Cylindrical forms is an object having a circular cross section with straight parallel sides.
Still-life composition on cylindrical forms
- The following procedure is used:
- Identify cylindrical objects such as cup and a jug. Use portrait layout. Draw the outlines of the cup and jug balancing it from the axis.
- Place the cup in front of the jug such that the jug does not block the cup to create an overlap.
- Ensure the cup and cylinder are drawn to occupy most of the working area.
- Start by making straight or slanted lines from the edges of the objects towards the center areas receiving more light as shown.
- Create the hatch lines as you move gradually to the lighter areas. Varied lines such as faint, thin or light are used to shade light areas and dark, thick and bold lines are used to shade dark areas. Use closely packed lines to create dark areas and sparsely packed lines to show the light areas.
- Draw hatch lines to crisscross the earlier lines. This is called cross hatching. Create a shadow to show the base of the two items. Complete the drawing and prepare for display.
Refer to bookmark art and craft grade 5 teachers book for images
- Crayon – is a tool for making a composition that is found in numerous shades of colour that is rubbed on a surface to create interesting patterns, features and compositions.
- Wax will be used in crayon etching where etching is the scratching through a layer to reveal another layer that creates an image and overlaying is applying a layer of material on top of another.
- The following procedure is used in making wax.
- Cut the bees or paraffin wax in small pieces and put it in a metal container. The amount of wax used should be equal to the amount of crayons you intend to make.
- Heat the wax in a container on low heat in a double container. It should not be direct heat but inside hot water. This is to prevent wax from overheating hence producing harmful fumes.
- Prepare your mold by rolling stiff paper in tubes. Place modelling clay on one end of the rolled-up paper tubes and place them on the working surface in an upright position.
- Add dry powder paints in a color of your choice to the melted wax and stir to obtain uniform colouration. Do not use liquid since it won’t mix.
- Press the rim of the metallic tin to form a spout.
- Remove your tin from the heat and carefully pour the mixture into the rolled paper mould.
- Leave the wax to harden. Using a cutting tool such as a knife or razor blade, cut the side of the rolled paper mould to remove the wax crayon.
- Wash your hands with soap and water. Clean the working area after completing the work. Taste the work to see how it works.
How to make a crayon etched pictorial composition
- You will require the following: paper, coloured crayons, black Indian ink or black powder paint, soap, soft rags, paint, brushes, scratching tools and masking tape.
- Rub patches all over a piece of paper using the bright coloured crayons you made. Rub on each patch several times, press down on the crayon to make sure the patch is fully coloured.
- Mix black powder paint with a little soap and water. The soap helps the powder paint adhere on the surface as shown below.
- Use a paintbrush to apply the mixed black powder paint on top of the surface covered with bright coloured crayons. Ensure you cover all the areas
to create a black overlay. This creates a top layer that will be scratched off to reveal the coloured crayons beneath.
- Use a sharp tool to scratch through the black overlay to reveal your pictorial composition.
- Scratch more lines to reveal light areas and less lines to reveal dark areas.

Please can you assist me with full notes
Please do that
Nice one,let me have all the notes kindly